Finished Reveal! (Almost…)

Well… Are you ready for the finished reveal!?! It has been a busy 3 weeks in our household. We moved into the new house on 11/12. Before move in we spent several days cleaning and getting rid of construction dust. After we moved in, there were still a million little things that needed to be done. Lights needed to be hung, baseboards caulked and painted, bathroom fixtures hung… not to mention I had to unpack and get the house decorated! And all of this before Thanksgiving. You see, I invited around 20 people over to Thanksgiving… back in August… so the house just had to be done. Why didn’t we just cancel, you ask?! Because that’s just not how I work… Haha. A little pressure is amazing for getting things done sometimes.

ANYWAY. So yes. There was a lot to finish. But amazingly, we finished most of our checklist. Now, we just have a few things to accomplish and a lot more time… which is NICE. I am SO happy with how things turned out.

So without further ado here are a few before and after pictures for you. The new one’s were taken on my cell phone… so no judging. Haha.

entry-wayEntry Way/Dining Room

We had to rip up the hardwood floors in the dining (left) and reinstall new ones… because the old floors were only in the dining room. There was no way to match them. So as much as it pained me we pulled them up and installed new. We opted to go with a smooth wood as the hand-scraped look is starting to go out of style. We repainted everything you see. New front door which was a roller coaster ride of emotions to get done and new staircase.
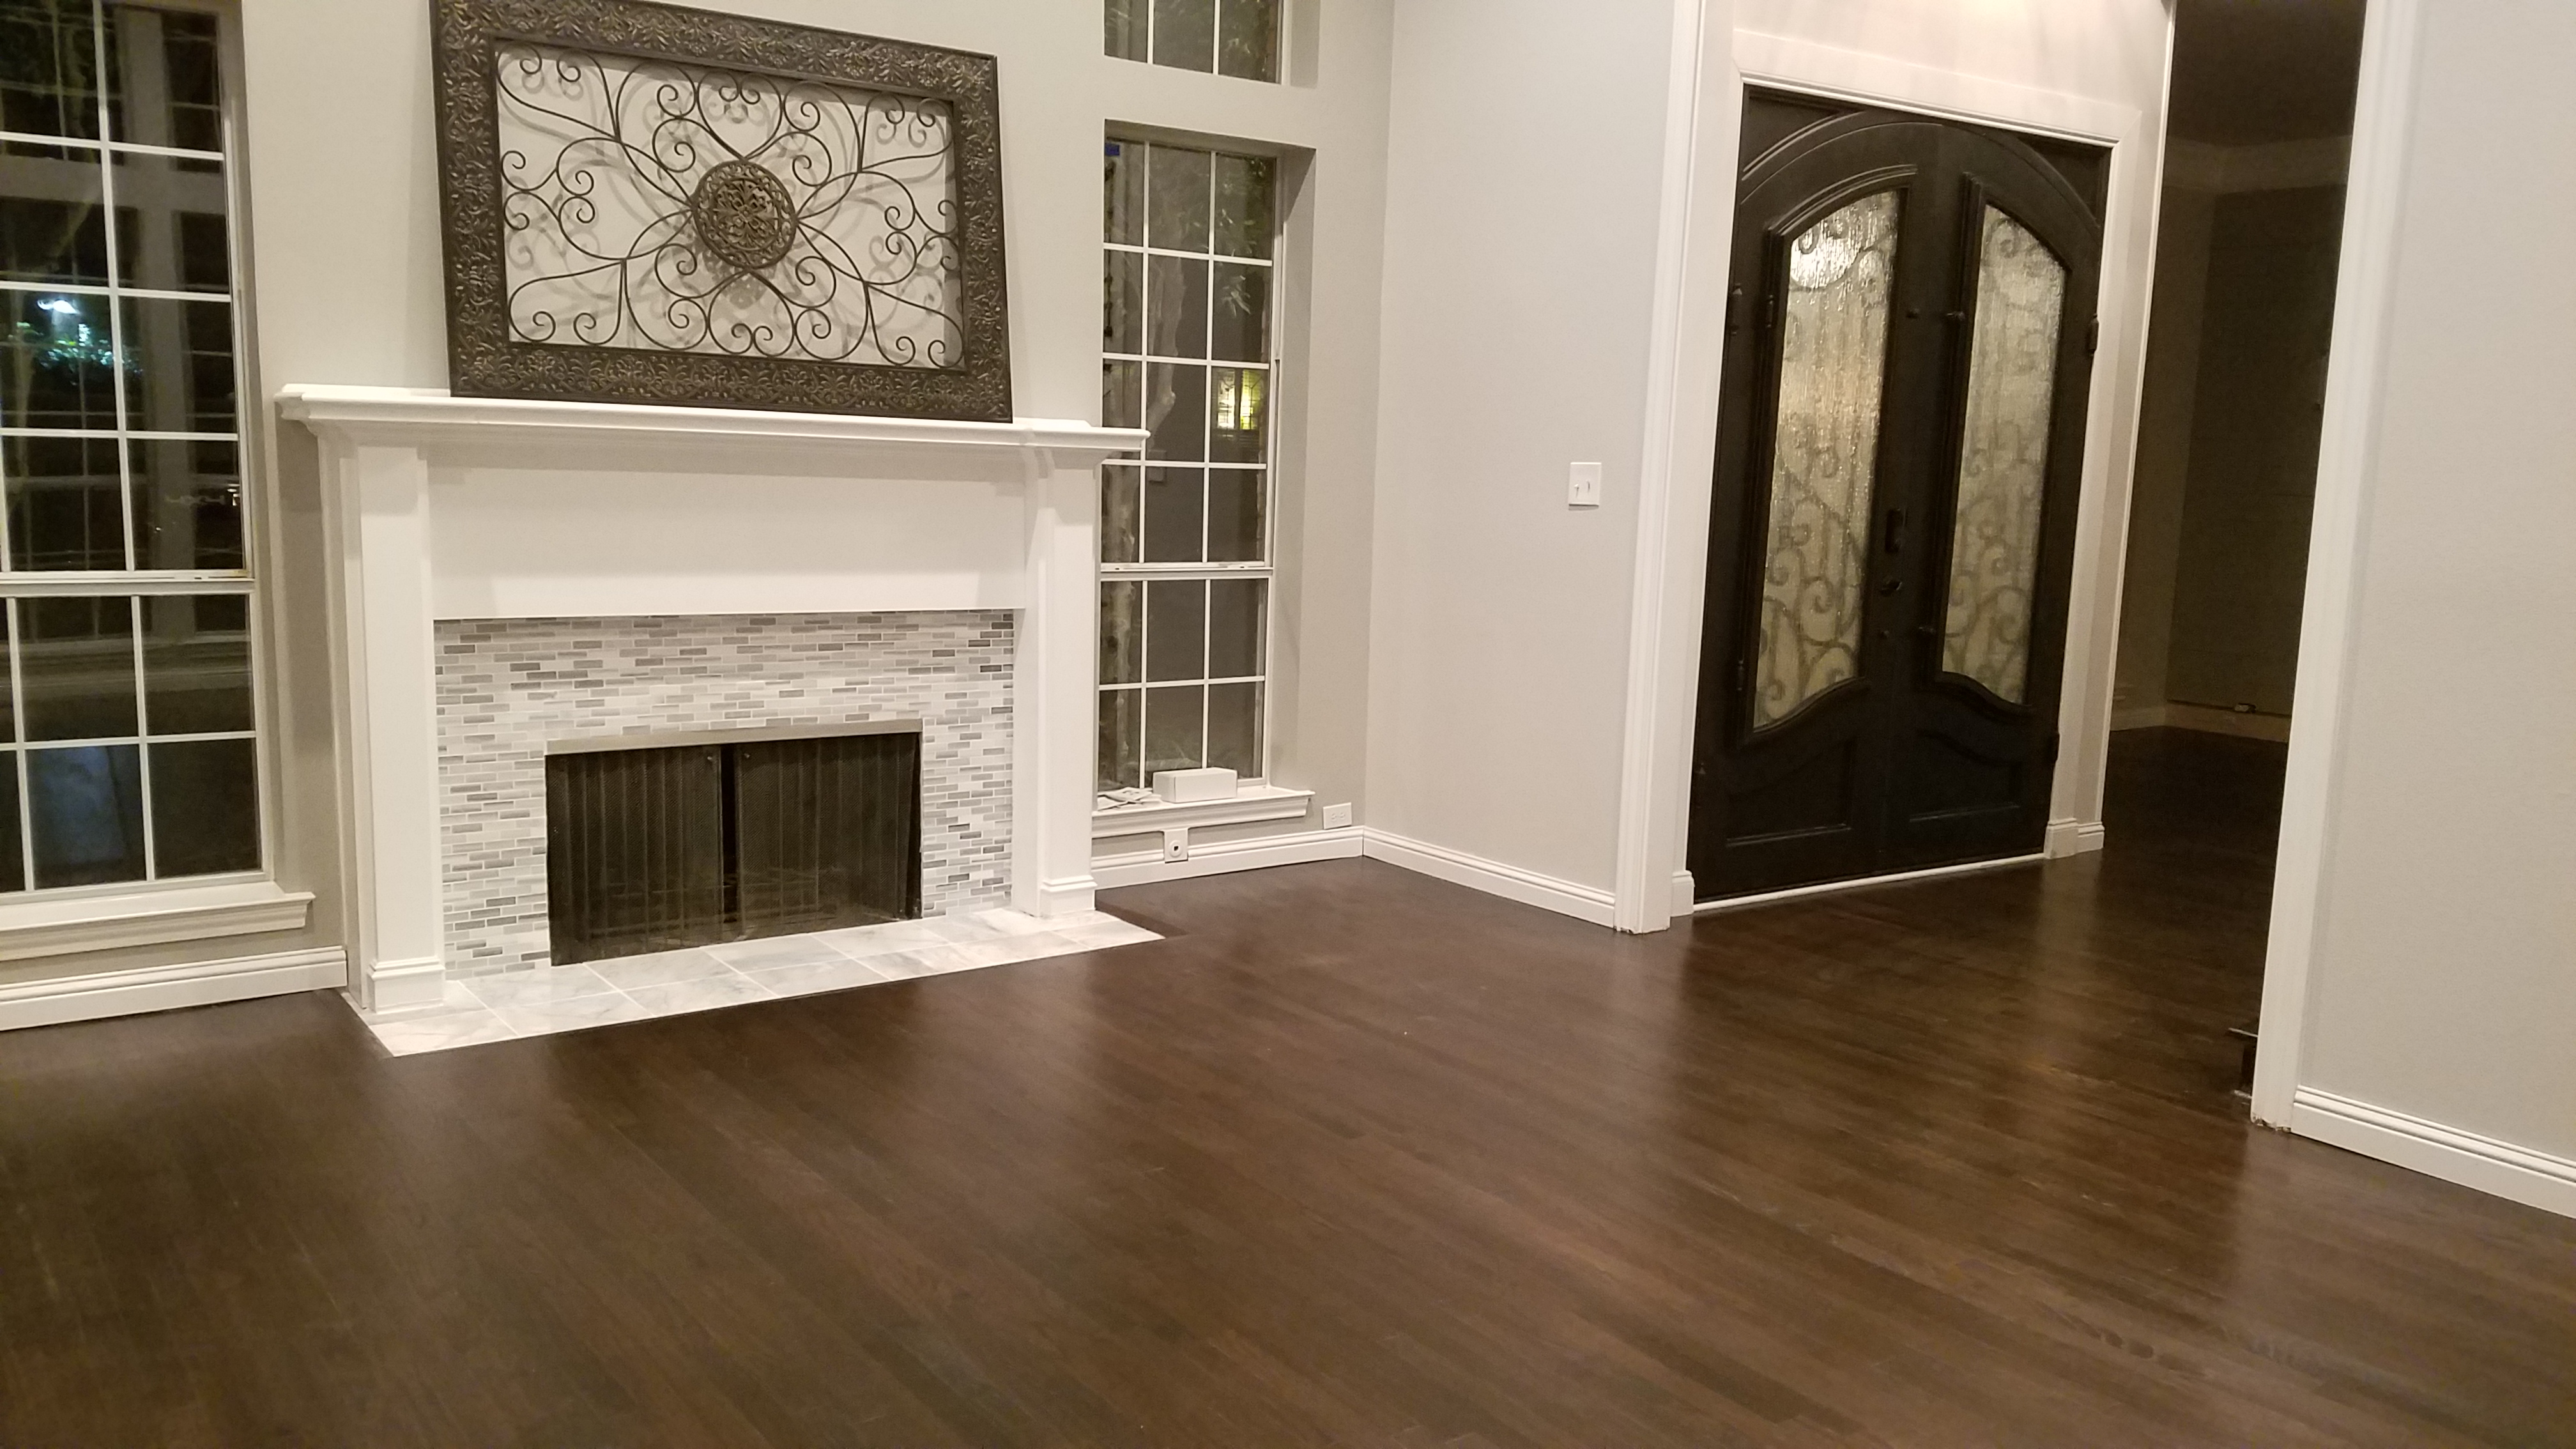
formal-living

Formal Living

The formal living room (right) is on the other side of the front door. We replaced the stone fireplace surround with carrera, pulled up the carpet and repainted everything. In this house, for some reason they had a tan paint on the walls and an almost peach for the trim. You can’t tell in the pictures… but EVERY surface had to be painted.

familyFamily Room

The family room (left) is off the dining room, so when you come through the front door, you can see all the way through back to this room. Prior to reno, the family room was paneled in a light oak with green tile floor and a carpet insert. I hated the lighting and the colors. We carried the hardwood floors throughout the entire bottom floor of the house, and painted the paneling in a light gray with white trim. We removed the large built in china cabinet to declutter the space and make it feel larger. The fireplace was re-tiled in a white quartz. The wet bar and bar in the kitchen were accented with stacked stone. All the light fixtures were replaced with more contemporary style lighting.

untitled

The Kitchen

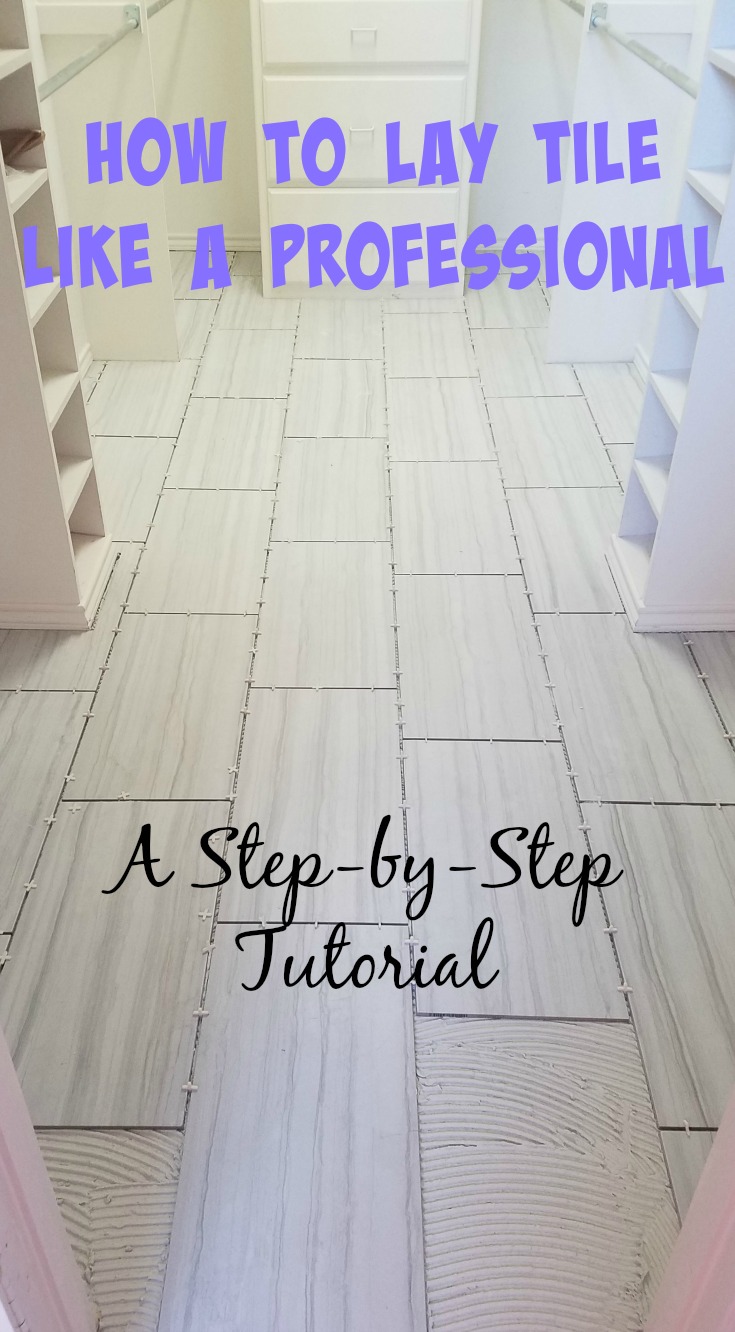
The room that took the most work was the kitchen (right). The two before pictures, show the light oak cabinets (Same color as the paneling in the family) and brown granite counter and backsplash. The accent lighting was gold, and the ceiling lights were dropped fluorescent lights. We dropped the bar around the sink to open the kitchen to the family room. I can’t stand being stuck in the kitchen when we have guests and not being able to see what is going on. This simple change makes it feel much more open. We painted all of the cabinets in a bright white; got rid of the dropped fluorescent lights and added can lights. I chose a beautiful white quartz counter for a white on white look. In the kitchen we put down a beautiful gray tile that meets perfectly with the wood so there isn’t a transition piece. We ran gas from the laundry room into the kitchen so we could have a gas range, we replaced the double ovens because they were little 24″ ovens and didn’t fit the cabinet size or our family needs. We put in pendant lighting with edison bulbs that gives the room a more modern feel. The backsplash is a gray glass tile pattern that accents the floors. And we went with a white quartzite stacked stone around the base of the bar to give it a more finished look. A modern single basin deep 14 inch sink and contemporary fixtures update the space beautifully.

stairs

Staircase

The staircase (left) got quite a makeover as well. We ripped out the carpet, replaced the treads and risers with wood. Redid the trim surround. Refinished the banister and replaced the ballusters with a beautiful ash gray finished iron spindle. We also painted the risers white to match the trim and stained the treads dark to match the floor. I love the effect. It just makes the entry way feel so much grander.

There are still plenty of rooms to show you, but we are still finishing minor touches on some of them. I will do a big reveal when we are finished with everything. Also, can I say, that having professional photos taken makes a huge difference? When I’m done staging I’ll be having those taken as well and post them so you can see the difference! This house has been so much fun to redesign.

I am simply in love.


DIY Tutorial – How to Lay Tile

Learning how to put down tile may seem like a daunting task. But, once you get the hang of it, tiling is actually not that difficult.

Tiling is one of those things that most people pay a professional for, and that’s fine. If you’re not a handy person, or you don’t want to get your hands dirty, that’s cool. You do you. BUT if you absolutely want to do all the renovation you can yourself… you have come to the right place!

There are some basic supplies you will need to get started:

    • Tile – If you’re just starting out, the easiest tile to use is 12 by 12.
    • Thinset – also referred to as mortar, this bonding agent will help the tile adhere to the floor
    • Floor Leveler – To prepare a level surface
    • A chalk line or square
    • A Trowel – to put down the thinset
    • Grout – Depending on the space between tiles you will need either Sanded or Non-Sanded grout
    • A bucket, Scooper, and Grout Float
    • Spacers
    • A drill with a mixer attachment
    • Tile Saw – We use this Tile Saw but we had a cheap little $100 saw that worked fine for the first several years. If you are just doing a small area, don’t invest a lot of money in a large tile saw.

Overwhelmed yet? No. Okay sweet. Now for the fun part.

  1. To begin, you must prepare your surface. I have never met a level surface yet. So, that’s where floor leveler comes in handy! To get started, prepare the mix the way it says to on the bag. I recommend self-leveling as it is easier to work with. Pour it on the floor, smooth the edges with a smooth trowel or spatula and let is set according to instructions – sometimes this is overnight, sometimes just a few hours.
  2. Once your floor is level, take a square or chalk line and draw a straight line down the center of your surface. (Wherever you want to begin). DO NOT start your tile along a wall. No matter how straight you may think it is, most walls are not square, and you will notice this in the grout lines in the center of your floor.20161022_120329
  3. Starting in the middle of your floor or surface ensure that you have a straight line regardless of the walls. (Tiling a wall is a little different as you have to start at the bottom – so I suggest using a level. Putting down the first row of tile, checking for level and adjusting with spacers or props as needed until you get the tile level.)
  4. Now that you know WHERE to put the tile, mix the thinset according to the directions on the bag. You don’t want this to be too soupy or too stiff. A good thinset is about the consistency of mashed potatoes.
  5. Using your toothed trowel, apply the thinset in even strokes. Make sure that your entire area is even, you don’t want globs. (Don’t put too much down at one time or you wont have a way to reach the edges.)
  6. Put down your first tile and then surrounding tiles. I don’t recommend laying them in a brick pattern as your brain searches for patterns automatically and if you’re slightly off you will notice. Put them in a slightly offset pattern.20161022_130220
  7. Once you have the pattern moving, it is fairly simple. Measure, cut and repeat.
  8. Don’t walk on the tile for 24 hours or so.
  9. Once dry, come back and grout. You can buy grout in a variety of methods. They have bagged grout that you have to mix, premixed grout, or tubes of grout that come out of a caulk gun. Any of them will work but if you have a large area the caulk gun method will take longer.
  10. If you are using dry grout, mix with water until you reach a consistency that is a little firmer than pancake batter. It shouldn’t run off your trowel but shouldn’t be too thick or it will be harder to get into the grout lines.
  11. Using a trowel and grout float, push the grout into the lines. When it has begun to set, come back with a sponge or wet rag and wipe up the excess. you will have to wipe multiple times to get it all up. (If you don’t you will end up with cloudy tiles).
  12. Seal the grout after it drys with an appropriate sealer. Using natural stone? Make sure to get a sealer that will cover the whole tile. Using ceramic or porcelain? You can buy a sealer that just goes on the grout lines.
  13. Sit back and enjoy! Once you’re finished sit back and enjoy all your hard work!!

Have questions about your project? Or maybe you have another project you want help with… Reach out to me and I’d be glad to answer any questions.

Want to check out some more awesome DIY Tutorials?

How to Sew Your Own Curtains

How to Landscape like a Pro

Staging How-To


Happy Renovating!

Something is wrong.
Instagram token error.

chrispro21

Follow
Load More

8 Organizing Tips for Moving

If you know me you know that I love to organize things. I may not be able to keep them that way for long – you know, with a 15 mo old – but I enjoy putting things in their proper place. I also like to make lists. And I’ve moved a lot. So, I’ve put together a list of moving tips to help make a hectic process easier. And I’m also compiling this list, to help myself remember what needs to get done before Saturday! Haha!

8 tips to help make moving easier:

1.) LABEL EVERYTHING!

fb_img_1478882168403

Labeling the box by room and by content allows me to quickly get unpacked after moving.

  • I think this one goes without saying, but if you want to know what’s in your boxes, you should probably label them. Now, I don’t just use the general labels here, I make sure to list things out. So instead of writing “Kitchen” on your box, you could add a few key items that are in your boxes.
  • Add terms like “Heavy,” “Fragile” and “Light.” So that heavy boxes of the same size don’t end up crushing the light boxes.
  • Label items “open first” so you know whether these are items that must be unboxed immediately.
  • Here are some great labels I like to put on my boxes: (Click the link to view on Amazon)

    These tapes are great for organizing your move.

2.) Box everything you can

fb_img_1478882177105

I also like to utilize baskets to easily transport items that don’t fit in a box or are odd shaped.

  • I like to box clothes with hangers on them – I have so many clothes hanging in my closet that it just doesn’t make sense to bag them.
  • Bulky items are much more easily moved if you are able to box them.
  • You can also use baskets if an item will waste space in a box.

3.) Pack boxes from the same room together in the truck

  • If you organize the moving truck so that all the kitchen boxes are together it makes unpacking the truck much easier. (Of course, this may not always be possible – but put them as close together as you can)

4.) Hire movers

  • If you can afford to do this – just do it. It makes life so much easier!

5.) Leave cleaning items in an open box – pack it at the back of the truck.

  • Whether you need the items to clean your old house or the new – chances are they will be needed, so leave them somewhere easy to access.

6.) Pack a Suitcase

  • Put all your commonly used items like toiletries and clothes for several days in a suitcase, this way you know where they are and you won’t be digging through boxes trying to get ready for work.

7.) Clean as you pack

  • One of the worst things ever is unpacking dirty and dusty items from boxes and having to clean after you move – so grab a duster and clean them as you pack!

8.) Don’t Stress

  • I know that this one is easier said than done… but try to relax. Before you know it you will be unpacked and living comfortably in your new place!

Did I miss anything? Do you have any great moving and packing tips? Let me hear them! Leave a comment below, or shoot me an email to christine@shescoveredinpaint.com